Behind the Stitches: My Process for Creating a Personalised design
- Ann-Maree Shaw
- Jan 16
- 4 min read

Updated: May 10
If you’ve ever thought about creating a personalised embroidered item—whether it’s a name on a hoodie, a pet portrait, or a meaningful symbol you might be curious about how the design process actually works. Today, I’m giving you a behind-the-scenes look at how I go from a blank canvas to a custom embroidery design that’s entirely unique to you.
No matter what the final design is, preparation always plays a big role in achieving something beautiful and personal.
Step 1: What Do You Want to Stitch?
It all starts with an idea, your idea.
What do you want your design to represent? Is it a memory, a favourite animal, a quote, a place, or maybe just an aesthetic? There’s no right or wrong answer, but getting clear on the “what” helps guide the entire process.
I also find it helpful to understand any preferences or constraints from the start. For example:
· Where will the embroidery go? (e.g. left chest of a hoodie, centre-back, tote bag)
· Are there specific colours you love, or ones you don’t?
· Do you prefer a minimalist or detailed style?
· Any special story or emotion you want the design to convey?
Having these insights upfront makes the process more intentional and avoids overwhelm from “too many options.”
Step 2: Finding the Heart of the Design
Even the most random or abstract ideas can be turned into something beautiful with the right approach. I like to ask: What’s the essence of this design?
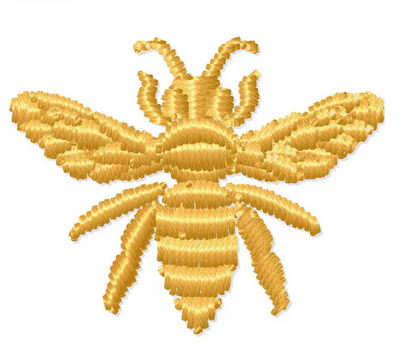
For example, if someone asks for a personalised gift to celebrate a friendship, I might explore symbols of connection (like interlocking hands, florals, or shared hobbies) rather than jumping straight to literal portraits. If the design is to commemorate a pet, I’ll look at distinctive features and personality to capture their spirit. If you are thinking "Spring" then we might want to think of flowers and bees.
You don’t need to have a deep backstory for your idea, but knowing the feeling or energy you want helps me craft something that feels truly meaningful.
Step 3: Sketching Out Ideas
Once I’ve got the concept and key elements, I move into the sketching phase. These are very loose at first—just me exploring what motifs or visuals could work.
If it's a more complex design (like an animal, or a crest), I’ll often start with detailed references and then simplify them into shapes that will translate well into stitches. I’m always asking: What’s essential here? What can be stylised? How can this work well on fabric?
For simple initials or monograms, this might mean exploring different letterforms, flourishes, or borders to suit the mood. Elegant, bold, playful, vintage, etc.
Step 4: Composition & Refinement
Now it’s time to pull everything together into a cohesive design.
This part is all about balance, how the elements interact in terms of shape, spacing, and focus. I often work in a few iterations, adjusting the layout and making sure the final design flows well in the space it’s meant for.
If the embroidery is going on clothing, I’ll also consider how it will sit on the body: will it feel too crowded? Does it have enough visual impact from a distance? All of this influences the final composition.

Step 5: Choosing Colours and Stitches
Once the layout is in place, I dive into colour and texture.
Depending on the type of thread, I’ll build a colour palette that matches your preferences or reflects the vibe we’re going for. I also match stitches to suit each element—some stitches give a smooth, clean look, while others add texture or movement.
For example, if I’m stitching florals, I might use satin stitch for soft petals and French knots for detail. For text, I like to test a few line stitches to find the one that gives the cleanest finish.
Often, I’ll do a little bit of sampling—testing different combinations on scrap fabric—to make sure everything works before I begin the final piece.
Step 6: Bringing It to Life
After all the planning, sketching, testing, and refining—it’s time to stitch!
Even at this stage, I stay flexible. Sometimes a colour that looked great on paper doesn’t quite pop in thread, or a stitch needs adjusting once I see it in context. But thanks to the prep work, most of the big decisions are already made.
The final result? A one-of-a-kind embroidery that’s deeply personal and carefully crafted—whether it’s a gift, a wearable statement, or just something that makes you smile every time you see it.

Why Personalised Embroidery is So Special
Creating a personalised embroidered item means that no one else has what you have. It’s not just a pretty piece—it holds meaning, intention, and a story. Whether you designed it entirely yourself or collaborated with someone like me, the end result is uniquely yours.
Want Your Own?
If you’ve got a vision in mind—or even just a vibe—I’d love to help bring it to life in thread. Whether you want initials, an abstract symbol, or a tribute to something (or someone) special, I can create a custom embroidered design just for you.
And if you’re not ready to dive into designing yet, I also offer ready-made designs that can be personalised with names, dates, or colours. It’s the perfect in-between of creative and convenient.
Ready to stitch your story? Drop me a message and let’s create something meaningful together.
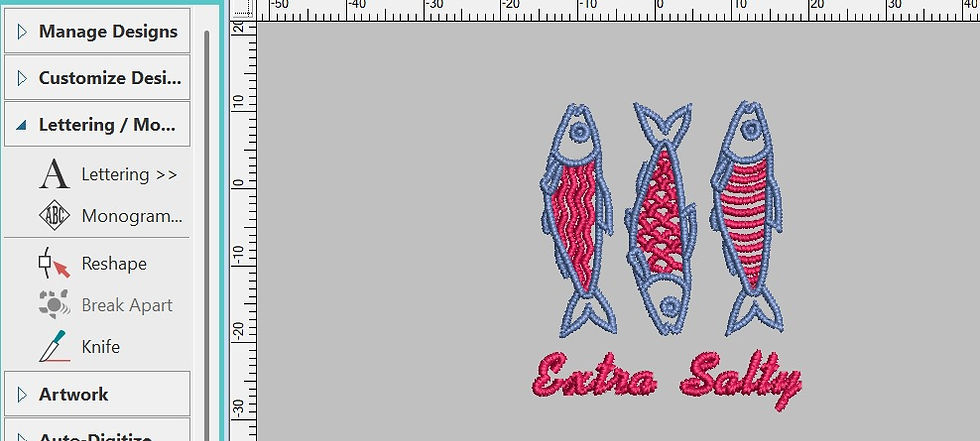
See the final design..
Comments